I'm getting ready for a little summer event (I'll reveal the secret in future posts) and I'll need strawberries for that.. So this weekend was a strawberry weekend! I feel like spring is just here and I can't wait for warm walks and flower picking! Have a great start of the week! til very soon! * Mi sto preparando per un piccolo evento estivo (rivelerò il segreto in post futuri) e mi serviranno delle fragoline.. Quindi questo fine setimana mi sono messa all'opera! Sento che la Primavera è dietro l'angolo e non vedo l'ora di fare passeggiate al sole tra i fiori! Buon inizio settimana! A presto presto!
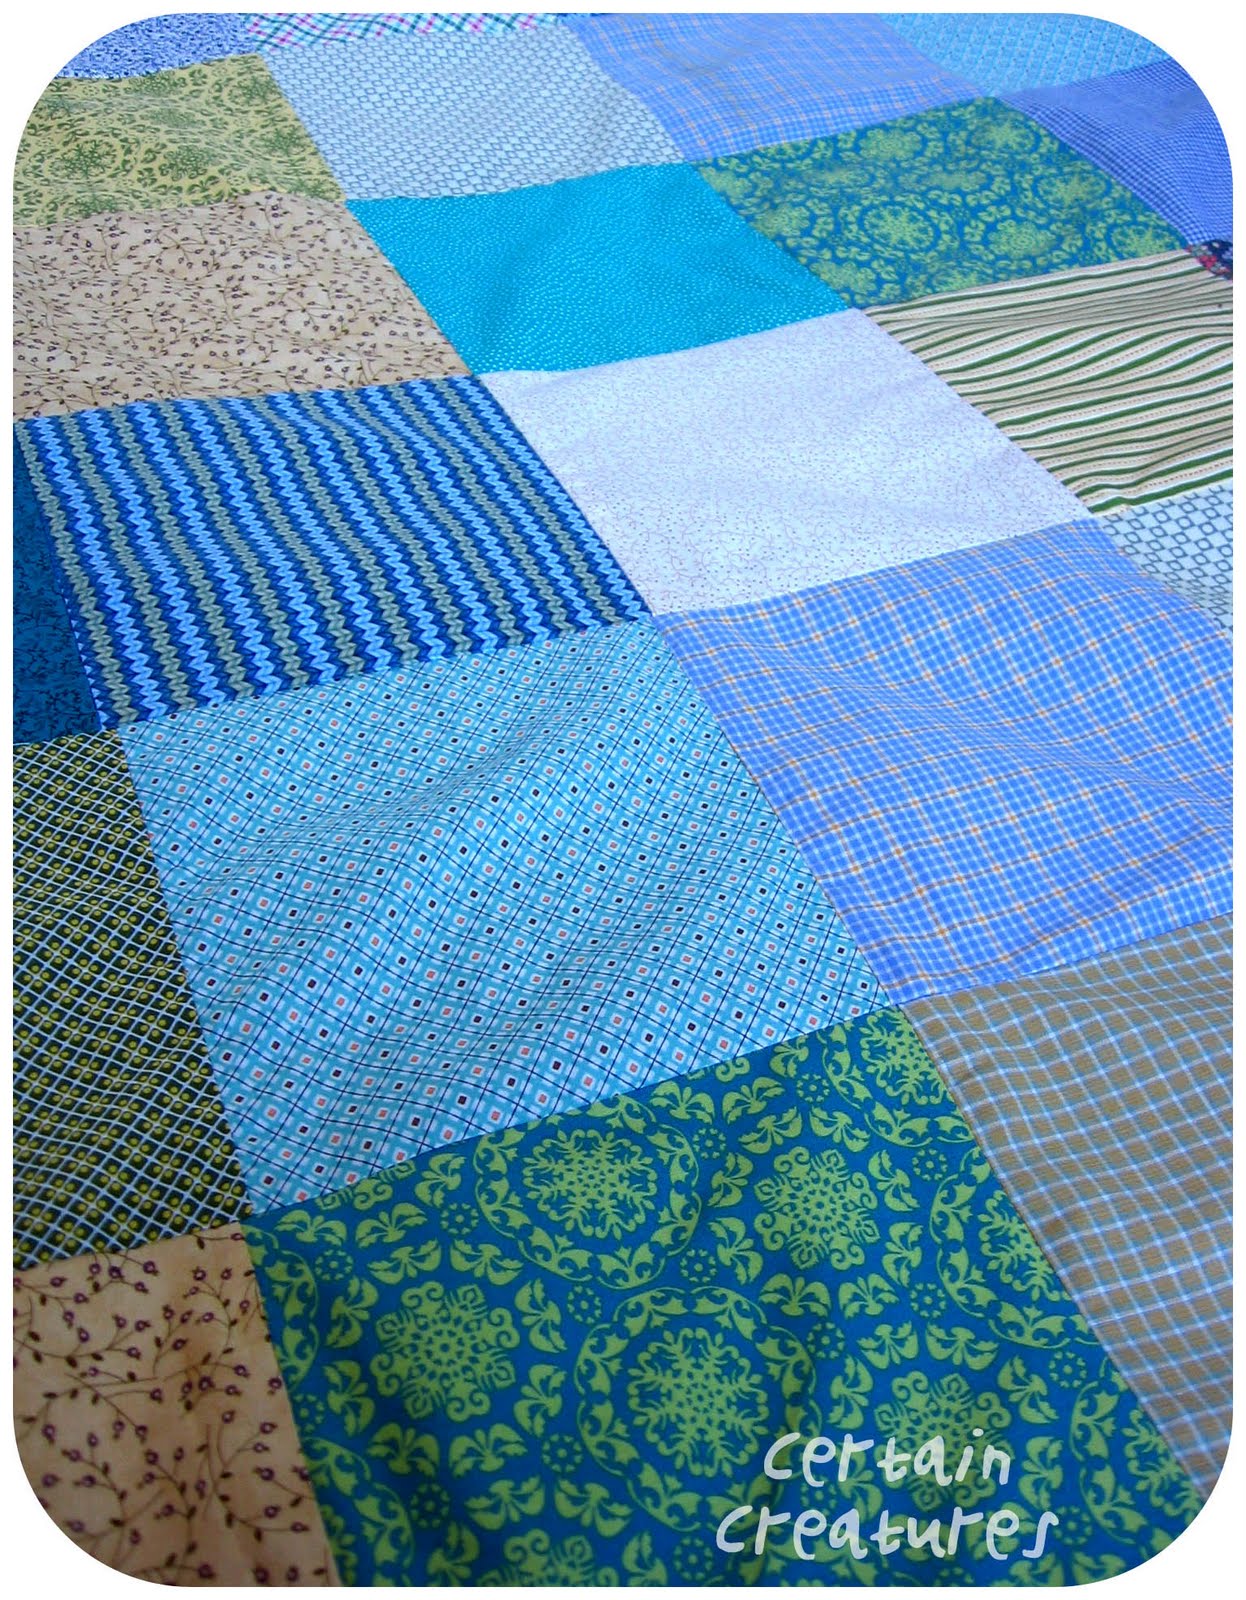
Here it is finally finished... the second quilt! * Ecco la seconda trapunta finalmente finita!
I wanted to post about it before but without the internet working it was impossible! * Averei voluto postarla prima ma senza internet funzionante a casa era impossibile!
I made it for someone special and it was really appreciated! * L'ho fatta per una persona speciale ed è stata tanto apprezzata!
I'll be back before the week ends with more news! So stay tuned! ;) hugs * Tornerò prima della fine della settimana con altre novità quindi state sintonizzati! ;) abbracci
You already know I love cardigans and I have fun decorating them from this, thisand this! * Sapete già che adoro i cardigan e che mi piace decorarli come vedetequi, qui e qui!
Here is my latest and I adore it because it's simple but the cute vintage lace makes it precious in a delicate manner! * Ecco l'ultimo.. lo adoro perché è semplice ma quel dolcissimo pizzo antico lo rende prezioso in maniera delicata!
Some little details.. * Alcuni dettagli..
Once again I'll be away this weekend! I'll post very soon next week ... there are sooo many projects I'm working on that there will be a lot to see around here! So stay tuned and have a very lovely weekend! Hugs *
Sarò di nuovo via questo weekend! Posterò presto la prossima settimana ... ci sono così tanti progetti a cui sto lavorando.. che ci sarà tanto da vedere! State sintonizzati e passate un meraviglioso weekend! Abbracci
[sopra: Bunny è alto 13 cm dalla punta delle orecchie alla punta dei piedi, è fatto interamente a mano da Certain Creatures per festeggiare i tre anni di blog. Se volete provare a vincerlo lasciate un commento a questo post. sotto: E' incluso un mini taccuino anch'esso fatto a mano da me che misura 3 x 1,5 cm per conservare i vostri pensierini..]
If you write about the giveaway on your blog you can leave a second comment (which means 2 CHANCES to win)! In order to give everyone a chance to take part (seen as many of you are on holiday at the moment - so am I) the giveaway ends on the 15th of September at 9:00 am! Good LUCK PS: if you do chat about the giveaway on your blog do remember to come back and add the second comment! ;) * Se parlate di questo giveaway sul vostro blog potete lasciare un secondo commento (che significa 2 POSSIBILITA' di vincere)! Per dare a tutti la possibilità di partecipare (visto che molti di voi sono in vacanza - anch'io) il giveaway termina il 15 settembre alle 9 del mattino! Buona FORTUNA PS: se pubblicizzate il giveaway sul vostro blog non dimenticatevi di tornare qui e aggiungere il secondo commento! ;)
Instead of a birthday cake, I made lots of little biscuits... * Invece di una torta di compleanno, ho fatto dei biscottini..
..and instead of candles I made a little Bunny Cake Topper holding a heart balloon and flag saying "happy Birthday". (I'll post more photos of the details of the bunny soon!) Happy Monday! * ..e invece delle candeline ho fatto un coniglietto con in mano un palloncino a cuore e una bandierina con suscritto "Buon Compleanno". (Presto posterò altre foto dei dettagli del coniglietto!) Buon lunedì!NB: click on photos to see them bigger cliccare sulle foto per ingrandirle
..romantic, and snow soft weekend! * ..romantico e sofficemente innevato fine settimana!
Instead my weekly hours of craftiness.. * Le mie ore settimanali di craftiness invece..
..will be spent decorating my third cardigan. (I'm sure you remember my first one and my second one) * ..saranno impiegate a decorare il terzo maglioncino. (Sicuramente vi ricorderete il primo e il secondo)
I'll show you how it turns out as soon as I'm done! hugs, til soon *-* * Vi farò vedere il risultato appena l'ho finito! un abbraccio, a presto *-* ps: nel post precedente il bar era quello della Mondadori in via d'Azeglio, Bologna
A Merry Crafty Christmas to you! *°*°*°*°*°*°*°* Tutorial Treat for you *-* Tutorial Cadeau per voi
(..post dedicato a coloro mi hanno chiesto come si realizza la rosellina.. ;) ) *step by step*
Make the needle come in and out of the fabric as shown in the two photos above. * Fate entrare e uscire l'ago dalla stoffa come mostrano le due foto qui sopra.
Wind the wool around the needle without pulling too tight. Wind it until the amount of wool wound on the needle is aproximately the length of space A (see picture below) - please note: the amount of thread you wind on the needle can depend on the type of thread you use! (In the photo space A is 1cm and I wrapped the wool around the needle 8 times) * Avvolgete la lana intorno all'ago senza tirare troppo. Avvolgetene tanto da coprire l'ago per circa la stessa lunghezza dello spazio A (vedi foto qui sotto) - NB: il numero di volte che avvolgete il filo intorno all'ago può variare secondo il tipo di filo utilizzato! (Nella foto lo spazio A è di circa 1cm e ho avvolto il filo intorno all'ago 8 volte)
Now hold the part of wound wool that is on the needle and gently pull the needle though. * Ora tenete ferma la lana avvolta intorno all'ago e con delicatezza tirate l'ago.
Continue pulling the needle towards you keeping the little wooly "tube" between your fingers. * Continuate a tirare delicatamente l'ago verso di voi tenendo tra le dita la "bisciolina" di lana.
Once the little "tube" has reached the other end of the fabric make the needle go through the other side of the fabric. * Una volta che la "bisciolina" ha raggiunto la stoffa fate passare l'ago dall'altra parte del lavoro così fermate il punto.
It takes a bit of practise but once you get the hang of it, it becomes easy and fun! * Ci vuole un pò di pratica ma appena ci prendete la mano diventa facile e divertente!
To make a bullion rose there are many different ways! I generally do 4 vertical bullion stitches like this above and then two horizonal ones.. then I squeeze it all gently to shape it.. then I add two more vertical stitches that wrap around outside where the horizontal ones meet. * Per fare una rosellina ci sono vari modi! Generalmente faccio 4 punti bullion verticali -come vedete sopra- e poi due orizzontali.. poi schiaccio delicatamente il tutto per dare un pò di forma.. e infine ne aggiungo altri due verticali dove le due orrizzontali si incontrano.
*°*°*°* Voilà *°*°*°*
I also improvise my roses.. because it is difficult to make them all the same .. :) actually I like them better if they are all different! * Improvviso anche le roselline.. perchè non è facile farle tutte uguali .. :) anzi a me piacciono di più se sono tutte diverse!
If you have any questions email me or add a comment! I'll be happy to answer any questions in the COMMENT SECTION! ;) * Se avete domande non esitate a chiedere tramite mail o nei commenti! Sarò lieta di aiutarvi e risponderò alle domande nella SEZIONE COMMENTI! ;)
All of my work (photos, artwork, crafts, tutorials, etc.) represented here, and elsewhere, is protected by copyright. You are welcome to use my tutorials for personal use (for you, for gifts, etc.), but not commercial use. Thank you! * Tutti i miei lavori (foto, immagini, crafts, tutorial, ecc) presentati qui, e altrove, sono protetti da copyright. Potete realizzare i miei tutorial (per voi, da regalare ecc) ma non per usi commerciali. Grazie!







.jpg)


