Showing posts with label Letterwriting. Show all posts

Monday, 4 February 2013

DIY Special Envelope with Stamps

Hello girls!
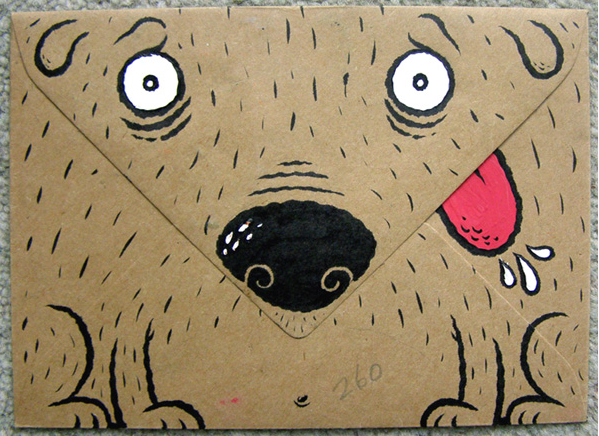
Another fun and refine way to decorate an envelope you are sending is to use cute stamps. Post offices are full of them, you just need to ask them and take the time to chose them!
*
Ciao Ragazze!
Un altro modo divertente e raffinato per decorare le vostre buste è usare francobolli particolari. Gli uffici postali sono pieni, basta avere il tempo per sceglierli!


The final touch can be to write out the address in special calligraphy like this!
*
Il tocco finale può essere di scrivere l'indirizzo in una calligrafia particolare come questa!
 Have a lovely start of the week

see you very soon!
*

Buon inizio settimana
a prestissimo!
Francesca


Thursday, 31 January 2013

DIY Special Envelopes

You know how much I love to letterwrite. If you like to letterwrite too, a way to make your letters even more special is to decorate the envelopes. That's my favourite part when I send a letter... Here are some examples I found on the web.
*
Sapete che adoro scrivere le lettere. Se anche a voi piace, un modo per renderle ancora più speciali è decorare le buste. Dedicare tempo alla decorazione della busta è la mia parte preferita quando scrivo una lettera... Questi sono esempi che ho trovato su internet.


Nowadays letterwriting is not very common.. it's a pity because writing and receiving letters brings such joy. They are better than emails or text messages.. inside the envelope there is a whole world that technology can't recreate.
Have a lovely end of the week my dears!
hugs
*
Oggi non si mandano quasi più le lettere.. è davvero un peccato perché scriverle e riceverle è davvero una gioia. E' meglio di una email o di un sms... dentro alla busta c'è tutto un mondo che la tecnologia non riesce a trasmettere!
Buon fine della settimana care 
un abbraccio

Francesca

Friday, 1 April 2011

Vintage Letter Tutorial

As you know, I simply love letters.. and I like vintage ones too. These are some really old ones I have at home. I find them so pretty!
*
Come sapete adoro le lettere.. e mi piacciono anche quelle vecchie. Queste sono alcune lettere antiche che ho in casa. Le trovo così belle!
I like calligraphy, stamps and sealing wax.. I often send vintage letters to friends! In this tutorial I'll give you some tips and how knows, maybe you'll get into it and send lots of letters in the style of the past!
*
Mi piace la calligrafia, i francobolli e la ceralacca.. spesso invio letter vintage agli amici! In questo tutorial vi darò qualche dritta e magari verrà voglia anche a voi di inviare letterine nello stile del passato!
You need:
-2 A4 sheets of paper
-a calligraphy pen and ink
*
Vi servono:
-2 fogli A4
-una biro con pennino e inchiostro
STEP 1: write your letter
*
STEP 1: scrivete la vostra lettera
STEP 2: fold the letter and place it in the middle of the other A4 sheet of paper. Start folding the A4 sheet of paper (see above) and continue as shown in the photos below.
*
STEP 2: piegate la lettera e posizionatela al centro dell'altro foglio A4. Incominciate a piegare il foglio A4 (vedi sopra) e continuate come mostrato nelle immagini qui sotto.
STEP 3: add a bit of glue so it doesn't open and then decorate as you wish with stamps, calligraphy and sealing wax.. this is mine!
*
STEP 3: aggiungete un pò di colla così non vi si apre e poi decoratela come più vi piace con francobolli, penna stilografica e ceralacca.. ecco la mia!
You can then decide to either send it as is or if you prefer you can put it in a real envelope.. mine have always reached destination and everyone LOVES them!
*
Poi potete decidere se inviarla così com'è oppure se preferite potete inserirla in una busta vera.. le mie sono comunque sempre arrivate a destinazione e le persone le ADORANO!
Happy writing...and til soon!
ps: if you don't have sealing wax remember my faux sealing wax tutorial!

*
Buona scrittura..e a presto!
Ps: se non avete ceralacca ricordatevi il mio tutorial di ceralacca homemade!

Tuesday, 15 March 2011

The Unique Envelope Tutorial

By now many of you know about my passion for letter writing! I also love recieiving them and it's sad to see that very few people write letters these days.. technology is taking over! When I send my friends letters I always try to make them look as pretty as I can. I choose paper, cards, stickers, stamps and envelopes very carfully.. It's my favourite part!
*
Molte di voi sapranno già che adoro scrivere le lettere! Adoro anche riceverle e dispiace sapere che sono sempre meno le persone che le scrivono.. la tecnologia sta prendendo il sopravvento! Quando mando le lettere alle amiche cerco sempre di renderle più carine che posso. Scelgo con attenzione la carta, i biglietti, gli adesivi, i francobolli e le buste.. è la parte più divertente!
Recently I made these unique envelopes which are a variation of this previous tutorial of mine of a while back.
*
Recentemente ho fatto queste buste uniche che sono una variazione di questo mio tutorial di tempo fa.
They are so easy and so inexpensive to make!
STEP 1: collect magazine paper you like
*
Sono facili da fare e non costano nulla!
STEP 1: raccogli fogli di riviste che ti piacciono
STEP 2: choose an envelope size you like and open the envelope flat
*
STEP2: scegli una busta della dimensione che ti piace e aprila
STEP 3: Position the envelope on the paper and then trace the outline
*
STEP 3: Posiziona la busta sulla carta e tracciane il contorno
STEP 4: cut out all the the envelopes you've traced
*
STEP 4: ritagliate tutte le buste che avete tracciato
STEP 5: Fold and glue all the envelopes!
*
STEP 5: Piegate e incollate le buste!
Arent' they beautiful!? Now decorate them and send them off! Your penfriend will be very happy!
*
Non sono bellissime?! Ora andatele a decorare e mandatele ai vostri amici! Saranno proprio contenti di riceverle!
Have a lovely day... til soon with more news!
Hugs!

*
Passate una bella giornata... a presto con altre news!
Abbracci!

Monday, 21 September 2009

Faux Sealing Wax Tutorial

As I have told you before I've always loved letterwriting! I've always liked the look of old style letterwriting and as a kid I love to make my own pretend stamps and seal letters with sealing wax. At the time I didn't own REAL sealing wax (I received that one Christmas to my delight), so until I had real profession sealing wax (like in the picture above) I tried every way possible to make my own.
That's when I came up with this idea!
*
Come già sapete mi è sempre piaciuto scrivere lettere! Mi è sempre piaciuto lo stile delle lettere d'un tempo e da piccola fabbricavo francobolli personalizzati e sigillavo le buste con la ceralacca. Al tempo però non avevo ceralacca vera (quella l'ho ricevuta con tanto piacere un Natale), quindi prima di avere la ceralacca professionale (quella della foto in alto) cercavo in tutti i modi di "fabbricarmela" da me.
Ed ecco che mi è venuta questa idea!
All you need is:
CRAYONS (old crayons or new crtayons)
MATCHES
MONOGRAM METAL STAMP
*
Avete solamente bisogno di:
PASTELLI A CERA (vecchi o nuovi)
FIAMMIFERI
TIMBRO CON INIZIALE DI METALLO
With this method you can seal an envelope or a note written on a sheet of paper folded as you see in the picture below.
*
Con questo metodo potete sigillare buste o biglietti scritti su un foglio e piegati come vedete nella foto sotto.
Start by melting a little bit of the crayon onto the envelope. Make sure you hold the envelope flap down with your fingers.
*
Fate sciogliere un pò del pastello a cera sulla busta. Tenete giù con le dita il risvolto della busta.
Rub the little bit of melted crayon that is on the envelope (when it is still liquidy) with the crayon itself to make a round shape and to create a base. Blow on it so that it hardens just a little and then add more melted crayon on top of that.
*
Spargete il poco pastello a cera sciolto sulla busta (quando è ancora liquidino) con lo stesso pastello a cera per ottenere un forma rotonda e creare una base. Soffiateci sopra così si indurisce leggermente e poi aggiungeteci sopra altro pastello a cera sciolto.
Then use your stamp...
*
Poi usate il timbro.......and VOILA'...
it sure looks and feels like REAL SEALING WAX but it's not!

TRY it.. It's easy and fun!
*
...e VOILA'...
è proprio come VERA CERALACCA ma non lo è!

PROVATECI.. è facile e divertente!
... and the COLLEST thing is that it can be ANY COLOUR!
It's not common to find REAL sealing wax in every colour - now you can change it everytime you send a letter!
*
...e la casa BELLA*BELLA*BELLA è che può essere di QUALSIASI COLORE!
Non è comune trovare ceralacca di tutti i colori - ora potete variare ogni volta che inviate una lettera!

*°*°*°*°*°*°*°*°*°*°*°*°*°*°*°*°*°*°*°*°*°*°*°*
This tutorial is for you and to celebrate my CERTAIN CREATURES' 2nd BIRTHDAY! A special ***thank you*** to those who always comment and email! thank you so much! ..And also thank you to those that come by just to visit! I'd love to hear from you!
*
Questo tutorial è per voi e per celebrare il 2° COMPLEANNO di CERTAIN CREATURES. Un ***ringraziamento speciale*** a tutti coloro che non mancano mai di fare sentire la loro presenza tramite commenti e email! Grazie di cuore! .. E un grazie anche a coloro che visitano sempre senza lasciare traccia! Se vi fate sentire mi fa tantissimo piacere!
*°*°*°*°*°*°*°*°
Francesca
xxx
 

blogger templates | Make Money Online